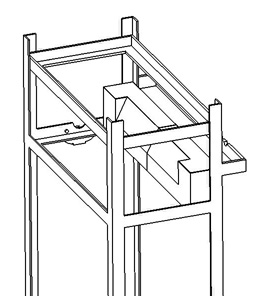
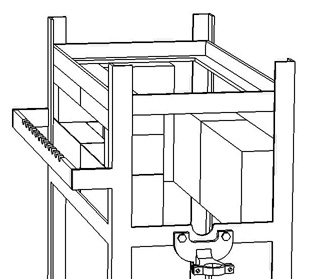
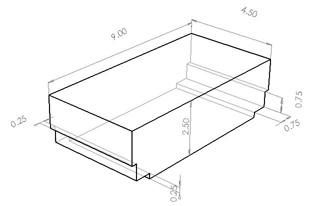
| This page is about cutting and shaping the insulation fire brick (IFB) for Dudley Giberson's Pipe Heater Design. This design was originally produced at the Haystack School and is featured in a chapter of A Glassblower's Companion, pages 105-106 called "The Pipe Heater." In the book the burner was fashioned using 3/4" round pipe. We now suggest using 1" square pipe x 1/8" thick walls. The hole pattern is the same as in the book. We suggest using the orifice chart from our web site. |
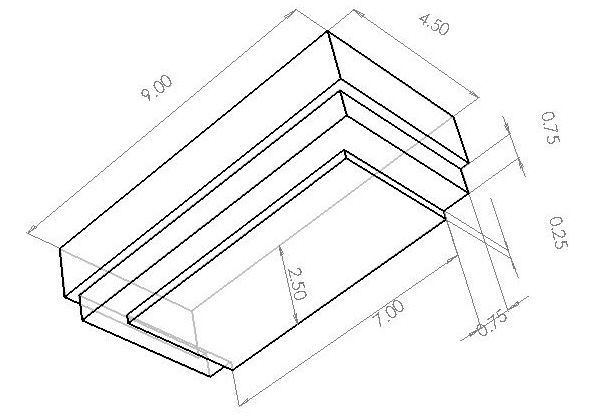
1
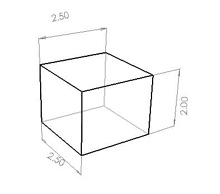
Requires 2 pcs., shaped as mirror opposites. |
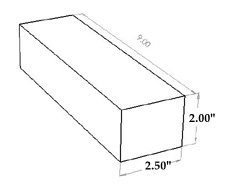
This brick is cut from a standard Insulated Fire Brick (IFB). I prefer to use a known brand like the AP Green "G23". You will need an old saw 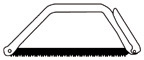 and a used wood rasp and a used wood rasp  to shape the bricks. Shape to dimensions given and place in the welded angle iron frame. to shape the bricks. Shape to dimensions given and place in the welded angle iron frame. |
 |
2
Requires 2 pieces. |
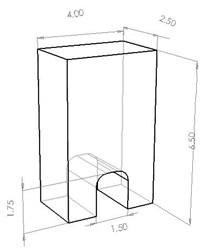
This little brick defines the height of the opening in the front of the pipe warmer. Here to the right is an image of this piece set in place. The opening is, of course, 2" high. I recommend sticking to these dimensions so your end product will function properly. If you really need a larger opening, we can make a larger burner for you, but that is a different pipe warmer. |
 |
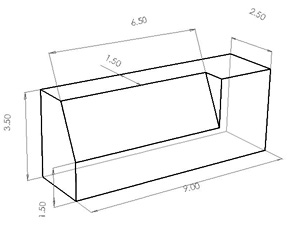
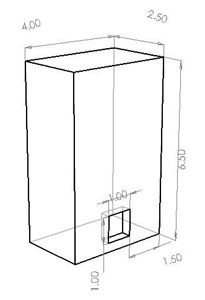
3

Requires 2 pieces.
|
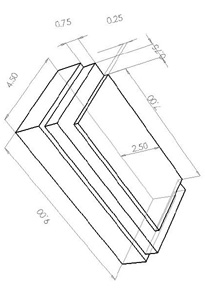
This one inch thick brick section will act as a lintel over the main opening. When this is mortared in place it acts as a single piece and holds up just fine. |
 |
4
Requires one piece.
|
To make the inset cut I use an old wood chisel  or perhaps an old screw driver. This tool will no longer serve as a wood chisel when you are finished, but it will be a welcome addition to your fast growing collection of firebrick shaping tools. Carving soft brick (IFB) is a real pleasure because it goes quickly, like carving chalk. or perhaps an old screw driver. This tool will no longer serve as a wood chisel when you are finished, but it will be a welcome addition to your fast growing collection of firebrick shaping tools. Carving soft brick (IFB) is a real pleasure because it goes quickly, like carving chalk. |
 |
5

Requires 2 pieces (unblemished out of the box), called "straights."
|
These two pieces are the only ones that you will not have to shape (unless you have screwed up along the way), but we trust that is not the case. |
 |
6
Requires 2 pieces.
|
This is a very straight forward project. I usually use my eyeball to shape these simple cuts, but if you prefer using a miter box, tack one up using a couple of 2 x 4s. Sometimes I use a diamond blade, like my 12" Red Blazer. But this is really overkill. The very best brick saw is a pruning blade held in what I call a Swedish frame. These can be bought for a few dollars and hold up for a good long while. |
 |
7
One Piece.
|
This piece only seems complicated. I would use the half round wood rasp to shape the small port. If you hold your work on a foot stool the sawing and rasping will go smoothly and you will be able to see what you are making. |
 |
8
Requires two pieces.
|
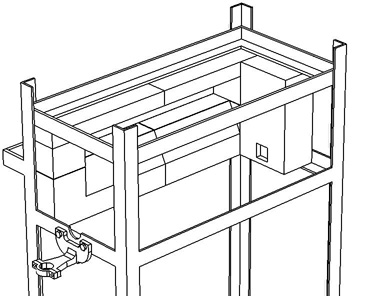
We are looking at the bottom of the brick, and it is at an odd angle. Click on the image to the left and you will get a larger image and if you think about it you will see where it fits in the top. This shape is shown in place to the right. This piece looks complicated but you are just making it fit the angle iron frame you have welded up. Patience pays off. This is the most difficult piece to make in the whole project, but keep in mind that we will mortar this in place so any looseness will be taken up by the mortar. |
 |
9
Requires two pieces. |
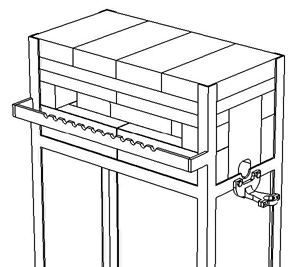
This is the final brick (pair). When all your parts are fashioned, remove them in an orderly way, wet the bricks, and mortar them into the iron frame using any high duty mortar. I use "Sairset" from Hunter Refractories (1-800-429-3673) which comes in a 50 lb. pail. Use as little mortar as possible to do the job. Mortar will shrink a little. The overall design of this pipe warmer is such that the parts if shaped properly will stay in place almost by themselves. My feeling is be skimpy with the mortar and clean up well. It is as easy to make a clean mortar joint as a sloppy one. |
 |
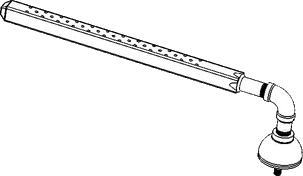 |
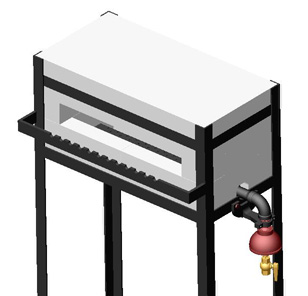
This is our great little pipe burner. Click for details to purchase this item. If you are interested in manufacturing your own please follow directions on page 106 of A Glassblower's Companion. Use orifice chart published here on this web site. |
 |
11
The Grand Finale |
Image of the movie (1.7megs avi file). Click to play.
|