| Wiring a Connection Board Without a Busbar
This example shows how to lace up the elements using various gauges of wire to accomodate the various amounts of power being conducted to the bolt terminals. Run the 50 amp (#6 ga.) wire from the mercury relay to the second set of bolts as this carries all the power. From the second to the first pair of bolts use #12 gauge as this wire will only carry 10 amps. From the second set of bolts to the third use #10 Ga. wire as this carries 20 amps. Finally use #12 gauge for the last 10 amps from bolts 3 to 4. |
The Marinite Connection Board on the back of our kiln. 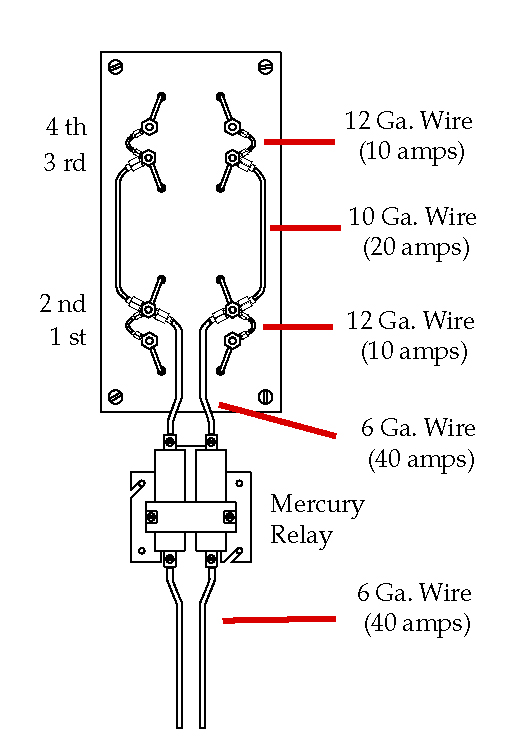 |
Wiring Pattern: 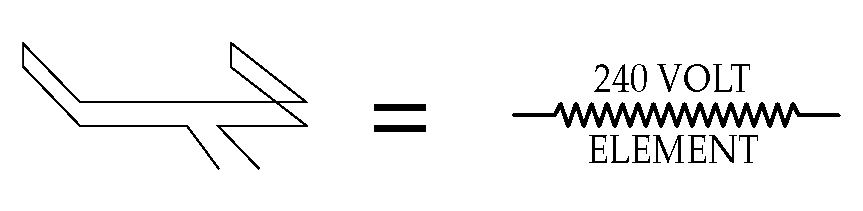 This image is just a sketch of the element path. The kiln has four elements which are installed in what is called the butterfly pattern where the elements come in from the middle of the back and exits in the back and they go in this rather circuitous route around the inside of the kiln to augment heat distribution. Here it is symbolically equated to a simple resistive element. In our kiln there are four elements connected in what is called a parallel configuration. The image to the right shows these four elements connected in parallel going through a mercury relay. |
 |
| More information about Marinite Connection Boards | |